Saturday, December 29, 2012

Happy New Year - Tussy Mussy

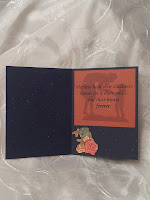
My dear friend Farley made a Tussy Mussy or two (or more) and I wanted to get in on the fun. What is a Tussy Mussy, you ask? Read on...


During the English Gregorian period (1714--1760), pestilence was rampant and indoor plumbing was not. Elegant ladies would often carry small bouquets of fragrant herbs and flowers to fend off noxious odors. Also known as nosegays, tussy mussies remained popular through the Victorian era.Tussy mussies came to be used as gifts, especially when a suitor would call on a young lady. Every flower had a meaning, and ladies referred to a book called the "Tussy Dictionary" to decipher the message.

Luckily, I don't have any noxious odors to fend off, and usually I find Victorian stuff to be a bit frilly or girly for me, so I tried to keep my tussy mussy elegant & simple.

Since Simon Says Stamp challenge this week is Anything Goes, I'm submitting my tussy mussy.

Thanks for looking and HAPPY NEW YEAR to all!

Paper: watercolor paper, Provocraft clock print & Club Scrap.
Embellishments: Happy New Year is a free download from SVGcuts.com & cut on my Silhouette. Clock, gear & ribbons from my stash.

Thursday, November 22, 2012

Thanksgiving Wishes


My wonderfully sweet SO's mom shared this with us this morning and after I sobbed my way through it, i decided it would be a fitting post for Thanksgiving Day. Thank you to all Dad's, Mom's, Grandparents, Military, First Responders, Teachers, Caregivers & Volunteers. 
If the boy walking to his Military Dad for the first time doesn't get you, the look on the little girl's face at 1:22 will.

To all my friends & family, I'm grateful today and everyday for your support, encouragement & friendship. 

As we express our gratitude, we must never forget
that the highest appreciation is not to utter words,
but to live by them. 
- John Fitzgerald Kennedy - 

Sunday, November 11, 2012

Holiday Card Workshop - Day 6 Part 2

Stained Glass Coloring:

In today's lesson, the super amazing Shari Carroll shared her technique for coloring stamped images to look like stained glass. Unfortunately i didn't have a stamp similar to what she used so i had to improvise.
The bell shape was cut on my Silhouette and then stamped/white embossed with a rhombus stamp from an old Club Scrap kit from 2006 called Retro. I tried using the distress ink markers, but i felt the pinks/purples all looked too muddy and similar, so I turned to some bic mark-its and sharpies and some old Tombow markers. Since most of these are permanent markers, i wasn't able to get that blended look by spritzing like you can with distress. I'm just ok with the final results after many epic fails.

Wednesday, November 7, 2012

Holiday Card Workshop - Day 6

Masking and ghost stamping:

Well, i honestly didn't do either masking or "ghost stamping" on this project, but i was inspired by Jennifer McGuire's card which i can't show you since it's part of the class materials. I'll describe it instead :). It was a white snowy hills landscape with a gorgeous star filled sky that was done with distress inks and stamps. It reminded me of this card that I pinned recently so I went to work on my interpretation. I felt this endeavor was better suited for an art piece than a card (although one could argue that Jennifer's cards are art pieces in and of themselves!).

This Cincinnati skyline was created in Silhouette Studio software by my wonderful sister and it's taken from a photo she took while visiting for use on this scrapbook page. I'm not sure if that link will work. Anyhoo, I cut one from black paper and one from a grey to create the illusion of the buildings reflecting on the Ohio river. I inked the base piece with Worn Lipstick and Dusty Concord Distress inks and i flicked watered down Metallic Pearl paint to create stars...the cutout stars are backed with silver paper from Club Scrap's culinary kit and i spritzed the entire background w/Perfect Pearls & water.

For the transparency overlay, I just created that on my computer and printed it to fit. I think it will look quite nice hanging somewhere in my house for the holidays. I couldn't get rid of the glare for the photo :(.


Tuesday, November 6, 2012

Holiday Card Workshop- Day 5

Perfect Pearl Resist & die cutting:

For the die cutting, I scanned a frame stamp that i have and created a cut for it in my Silhouette studio software. I then cut that shape a couple times from some Club Scrap paper in red, after which i stamped and embossed the frame and a greeting that conveniently fit inside it with Whispers Pearl embossing powder. I used perfect pearls (mixed with water) in copper and bronze to paint over the resist. The snowflake background stamp is an unmarked cling mount stamp in my stash and the paper behind the frame is from a yummy mat stack called Old World Winter by The Paper Studio.
Sorry about the photos...that perfect pearls is positively shiny!!!


I'm editing my post because i just made another card. I couldn't stop painting with perfect pearls so i made several. This one is my fave. I'm learning that i don't like predominantly brown cards...for me kraft is ok for a background, but i guess i like more color. I love the journey that creating takes me on! This little beauty is painted with Forever Green perfect pearls and water over black paper. The background panel is another lovely piece from The Paper Studio's Old World Winter card stack.


Monday, November 5, 2012

Holiday Card Workshop - Day 4 part 2

In love with this stamp (Vintage Santa by Stampabilities). Used it at a card swap and had to go buy it the very next day. The word Believe is from the dollar bin at Mike's. I colored Santa with colored pencils and added some shimmer to his beard and the star with pearlescent watercolors. Gem from my stash. Sparkly red and black paper from Club Scrap.


Holiday Card Workshop - Day 4

Outline stamps:  LOVED all of Jennifer McGuire's shared techniques for coloring today (except the copic air thing...no thank you). I opted to use my shimmery watercolors on this cute bird from Outlines Stamp Company (i think)...which is no longer in business i hear.


Holiday Card Workshop - Day 3

Trying to keep up with this card class, but i'm losing the battle so my descriptions/posts will be brief :).

Embossing with Scoring board: Really like this technique...simple but turns ordinary paper into something special. Ornament stamp is Hero Arts cling stamp i think. Sentiment might be Club Scrap...not sure. Colored the ornaments with colored pencils and then applied glossy accents over them for some shine.


Faux Fresco: Not sure i understand this technique and I'm not delighted with the way i executed it, but at least now i know that i don't really want to try it again :). Not sure where the leaf paper came from. The copper is from Club Scrap and i used a really old leaf punch from my stash..


Sunday, November 4, 2012

Holiday Card Workshop - Day 2 part 2

I don't have much to say about these cards. I don't love them, but maybe I can pretty them up some.


Friday, November 2, 2012

Holiday Card Workshop - Day 2

As my dear friend Farley said...this card is complicated, any way you look at it :). So many things went wrong that i'm not going to bore you with the details. Anyway, the idea is that this ornament shape should be a window to the inside of the card. Mine is not. I just raised the panel on foam dots. Also, the snowflake is supposed to "float" over the opening but you can't really tell that it does on mine. COMPLICATED...probably won't make more of these, but that's the wonderful thing about this class. You can try new things and decide where your strengths and favorites are...this one won't go on either of those lists.


I haven't gotten around the the 2nd card for Day 2 yet...sit tight, i'll get er done.

Holiday Card Workshop - Day 1

Oh my...The Holiday Card Workshop from Online Card Classes started on Monday, but I had school commitments M & T, then Halloween on W, so I finally got to play on Thursday evening and I can't say i'm always thrilled with the results, but i'll keep trying.

These 2 cards were made with a wonderful stamp set from Penny Black called Foliage Fancy  The sentiment on the left is from that same set and i'm not sure where the sentiment on the right is from. Anyhoo...I colored the leaves with colored pencils and tried my darndest to blend red and orange and i did ok i guess. the background paper is from Graphic 45 "on the Boardwalk". The leaf panels were inked with Wild Honey & Vintage Photo distress inks.


The next bunch of 3 looked great in my head but didn't translate to paper quite as well. I think they just look FLAT and that could be because they are. I'm thinking i will cut these cards down and use as a panel on another card so there is some depth. For what it's worth, here they are:

Birthday greetings for a squirrely girl

Now that my sweet friend Nancy has received her birthday card, I can post it. What is ironic is that it uses 2 elements covered in the first couple days of the Holiday Card Workshop i'm enrolled in online; coloring and window cards. My coloring skills are seriously lacking though...anyway, i pinned this card some time ago to copy and so here's my take. I think the squirrel is TPC Studio, but i can't be sure...i gave the stamp set to the Squirrely birthday girl!

Wednesday, October 31, 2012

Have a Creepy Halloween

I made several Halloween cards this year...some i like better than others :).
Below is a sampling of some of my favorites.

This might be my favorite. The scull stamp is from Red Lead and is heat embossed in glossy black
Border was cut from a piece of paper in my stash, but i'm sure there is a web border punch available (probably martha)
The sentiment is actually a combination of 3 stamps that I selectively inked and stamped using my stamp positioner in order to create the creepy message.
The spider was cut on my Silhouette. The paper is a variety from my stash.
This lovely card was for a dear friend who happens to have a birthday near Halloween. The center pendant and 2 embellishments are removable and wearable and interchangeable thanks to a magnet glued to the back of the pendant and washers glued on the back of the other discs.
Paper is DCWV Bella Armoire, Club Scrap & Martha Stewart


These two showcase my love of the AMC show, The Walking Dead & feature the bad-a** Daryl Dixon. They are macabre, but with a humorous twist.
Image and sentiments were created on the computer, printed and splattered with watered down red paint.
Paper is DCWV Bella Armoire (love this pad of paper!!) 


I guess this is all i have available photos of right now. 

Happy (Creepy) Halloween to All!


Monday, October 15, 2012

Squirrely Challenge - In The Middle from TJ

The fabulous Nancy from Squirrely Art challenged us squirrel girls with this cool and oh so easy technique from TJ and I gladly accepted! I have many holiday ideas in my head, so I can't wait to make more!

Paper: Club Scrap Wheel & Sprocket Purple, Kraft & White
Stamps: Club Scrap (sentiment) & uknown (birds)

Tuesday, September 4, 2012

Ink pad storage out of 2 Club Scrap Pizza Boxes!


Those of us who have been monthly members at Club Scrap for some time, have accumulated quite a collection of their famous pizza boxes. I’ve used mine to store all kinds of things (tax documents, wood mounted stamps, game pieces, and of course paper!). In addition, I’ve used them for wrapping gifts of all kinds. Well, I have been wanting to buy or make a storage box for my ink pads and so I played around one night and came up with this. I’ve only just started using it, so I don’t know how well it will hold up, but I love that all the inks are in one place and I can easily see, remove and replace them. I’ve chosen to store the pads upside down, because I found it easier to pull them out this way. I’ve also applied a strip or two of ATG tape to the bottom side of each pad to hold the matching inking foam.


I have created a written tutorial with plenty of photos. If the link doesn't work for you then just send your email address to me at cameragal67@gmail.com. 

Monday, August 27, 2012

Friday Mash-Up #73

I was thinking about a couple techniques and the Friday Mash-Up challenge while in the shower (i do some of my best thinking there) and I had an inspiration to combine a few ideas. So, my thought was to sort of combine Triple Stamping technique with  The TJ Embossed puzzle technique I did last week and make a Thank You card for The Friday Mashup Challenge #73. Here is the result:


Paper: Club Scrap: Blue panel-Gimme A Ring, White panels-Lotus Pond
Embossing Folder: Sizzix Tropical Paisley
Inks: Hero Arts: Pool & brown, Chipped Sapphire Distress Ink
Sentiment: Unknown
Punch: Butterfly
Other: perfect pearl spray

Friday, August 24, 2012

Squirrely Challenge - Embossed Puzzle

Not much time to write, but Miss Nancy at Squirrely Art tasked us squirrel girls with trying out the TJ technique called Embossed puzzle...and here is what i came up with.

Embossing Folder: Darice
Distress Inks: Peacock Feathers, Picked Raspberry, Mowed Lawn, Squeezed Lemonade & Black Soot
Paper is Club Scrap
Button from stash.

Have a good night!

Wednesday, August 8, 2012

Squirrely Challenge - TJ Technique/Distressed Spritzing

Not much time to write tonight. Literally rushed this card together in about 20 minutes. No frills, but needed for a birthday.

Playing along with Nancy's Squirrely challenge as well as The Play Date Cafe #144. Perhaps i should have used a different stencil since you can hardly tell that a flower stencil was used to create the background. Oh well, I gave this TJ technique a shot! I used Distress Inks (Spun Sugar, Worn Lipstick & Barn Door) for the background. I stamped the flowers in Club Scrap's India Ink...i think the flowers and sentiment are from SU Garden of Life stamp set. I used Distress Markers (Mustard Seed & Wild Honey) to fill in the centers and Worn Lipstick to darken up the flowers.


This week's suggested colors are:

Pink Carnation
Orange Sherbet
Lemonade

Sunday, July 15, 2012

Play Date Cafe & StampWithTami inspiration for Paper Crafts July Gallery Challenge


When I saw this video posted by StampWithTami on the same day that I saw this gorgeous color palette by The Play Date Cafe, I was compelled by a force beyond my control to make this card. Then I stumbled upon this shaped card challenge at the Paper Crafts blog and I knew it was my destiny :).


Caribbean Blue
Shoreline
                                   Sunshine - my "sunshine is a lot brighter yellow :)

I'll let Tami explain to you how to make the card. I did "make it my own" a little by adding the black pen stitching along the front buttons and around the pocket. I also chose square brads because that's what i had on hand. Oh, and I added a clothing label. TFL

Stamps: Palm Tree is All Night Media, Greeting is from unidentified stamp set bought at consignment shop
Paper: Club Scrap: Pure & Simple black. White-unknown
Inks: all TH Distress Ink colors: Tumbled Glass, Peacock Feathers, Mustard Seed, Black Soot

Monday, July 9, 2012

The Paper Players Colour Challenge #103

I needed a special card for a very dear friend who is having surgery this week. I found a great couple of techniques at DO stamping with Dawn and I was eager to try them out. Then, I checked in on The Paper Players and look at the yummy color combo they've challenged us with:

My substitute for Daffodil Delight is a much paler yellowish/ivory and the photo doesn't show how great the colors look together. My green is only on the leaves of my flower, but I hope it counts!

First, I followed Dawn's excellent video tutorial for Triple Time Stamping here. Then I added one of her Faux Suede Flowers following this video tutorial. She has so many great tutorials...you should check out her site!
The paper is all from a Club Scrap collection called Memoirs, which is only available now as a digi kit - no paper :(. The background stamp is HA Flower Dot Pattern and the Flower stamp is from this UM sheet of rubber from Club Scrap's Interior Design kit. The sentiment stamp is also an UM set from Club Scrap, but I don't remember the name.

Sunday, July 8, 2012

Happy Birthday To Me!

The quote below was given to me on a small piece of paper by my SO's father back in 2008. I have carried it in my wallet with me every day since. Yesterday, we (his family) gathered at his grave to pay respects to the charismatic man known as Joe Flannery. I had planned to read this quote, but just couldn't make it through without crying, so my SO read it for me and I want to share it here today for my birthday.


The best thing you have in this world is today. Today is your savior; it is often crucified between two thieves, yesterday and tomorrow. Most of our misery is left over from yesterday or borrowed from tomorrow. Whoever planned this life of ours did well in giving us one day at a time. Don’t let the past unman you, benumb you with remorse, weaken you with self contempt. As for the future, the best preparation for it is an unafraid today. Today is yours. God has given it to you. All your yesterdays He has taken back; all your tomorrows are in His hands. Today is yours, just a little strip of light between two darknesses. Use it so that at its close you can say; “I have lived and loved today.”
                                                Dr. Frank Crane


Wednesday, July 4, 2012

Happy Birthday America!!

I hope everyone in the US has a safe and enjoyable 4th of July Holiday spent with family and friends!!

A while ago, I participated in a patriotic rosette swap over at Club Scrap. Below is a pennant banner I made using some/most of the rosettes I received. I just love all the different variations. I just hand cut the pennants (getting 3 out of each 8.5x11 sheet) from white cardstock. Then I added blue brads in each of the upper corners. To string them together, I used white embroidery floss. I also added sticker letters to the bottom of each pennant to spell  F-R-E-E-D-O-M.


Thanks for looking and have a wonderful holiday!

Tuesday, July 3, 2012

Vintage Birthday

I needed a masculine/humorous card for my SO's brother who turned 47 recently. The card is just a kraft card base with a strip of typewriter keys paper from the DCWV Timeless Type Stack. The typewriter stamp is from Club Scrap's '04 Extra Extra collection. The pointing hand I cut from a piece of paper from DCWV's Heirloom stack. I used a typewriter font on my computer to create the piece of paper which i slid into a slit I cut into the stamped typewriter. Edges inked with antique linen distress ink. So cute...so easy.

Tuesday, June 12, 2012

Missing my Dad

Today is 3 years since my Dad passed away. It's amazing to me how painful it still is that he's gone. Also amazing is how frequently something will pop into my head and for just a split-second I think "I need to call Dad and tell him". I am equally amazed at how many times I quote him or use one of his silly expressions, or do something the way he taught me.  Gosh I miss him so much it sometimes overwhelms me. Does that ache ever go away?

When he was in good health, he often sang and even sometimes he did a crazy little dance that still makes me smile when I see it in my head. He called me his "tweetie-pie" and would sing a made-up song that was just for me. I'm sure many girls think they have the best Dad and I'm no different. I miss him every day.

If you are fortunate enough to still have your Dad, or a Dad in your life, hug them often and be sure they know how much you love them; you'll be glad you did when they are no longer around.

I'll leave you with a verse to a song that he often sang for no particular reason:

A Bushel And A Peck

I love you a bushel and a peck

A bushel and a peck and a hug around the neck

A hug around the neck and a barrel and a heap

A barrel and a heap and I'm talkin' in my sleep

About you, about you

'Cause I love you a bushel and a peck

You bet your purdy neck I do.

Rest in Peace Carl "Coddie" Rodgers....until we meet again.

Friday, June 1, 2012

Squirrely Challenge - Colorful Silhouettes

Mother Squirrel, aka Nancy at Squirrely Art, has challenged the squirrel girls to try our hand at a Technique Junkies tech from the Aug/Sept 2011 issue called Colorful Images. Very simple technique, but renders nice results. I pinned this card a while ago and this seemed the perfect opportunity to do it. Getting a very early start on my Halloween cards I guess!
I don't know the stamp manufacturers for the bats, raven or Happy Halloween, but the crackle background is from impression obsession and the tree is from Posh Impressions (good ole Dee Greunig...remember her??) Used distress inks, rusty hinge, wild honey & brushed corduroy just like my pinned example did, but i decided against the fluffy white clouds.
Thanks for looking and be sure to check out the other squirrel girls.

Jennifer
Connie
Julie
Diana
Rachelle
Farley

Friday, May 11, 2012

Happy Mother's Day (a wee bit early)

Blogger has thrown me for a loop. I'm still getting used to the re-design of posting, but this too shall pass.
Below are my Mother's Day Cards for my Mom and my SO's Mom. Hopefully neither will peek at my blog before Sunday.
For both cards, i've used paper from Graphic 45 & Club Scrap Celestial & Concrete Jungle Kits. 
The Silhouette was (oddly enough) cut on my Silhouette from an image I found online and traced as was the oval cut out and oval frame.
 
I'm submitting this first one for the following challenges:
PP94 (The Paper Players Challenge Blog) - In Celebration of Mother's
MMSC 138 (Midnight Madness Sketch Challenge Blog) - Sketch
PPA134 (Pals Paper Arts Blog) - colors: Calypso Coral, Baha Breeze & So Saffron
   
PPA134
Here's the 2nd one...similar but different and using the same papers and shapes, etc.


Friday, April 27, 2012

Way late in posting this

My sister had a birthday last week and altho i sent my card on time, i didn't get a chance to post it in a timely fashion. She is an avid bike rider and I thought this was perfect for her. I took inspiration from several different google images and it came together almost exactly as I had envisioned (which never happens!).
I used an actual map of California (where she lives) and the rest of the papers are from Club Scrap kit called "Expressions". The girl on the bike image is a shape I actually purchased from the Silhouette online store. I cut it out of white paper (with my silhouette) and then inked it with black soot distress ink and sprayed with perfect pearl water mixture. I made the card into a z-fold with a window so the girl would pop off the front. She is mounted onto a transparency that was also cut with the silhouette. I found the quote online and built everything else around it. I just love it and it was soooo perfect for a cyclist!

Happy birthday sis. I love you and miss you bunches. Can't wait til we ride together again. kiss kiss.

Sunday, April 22, 2012

Color Throwdown & Club Scrap Sketch

Details will be brief as its getting late. I'll update the post later, i promise.

Sketch is from my sister Jen via a Club Scrap Challenge she hosts.
Colors inspired by Color Throwdown (#188).

Papers from Club Scrap Kits: Birds of a Feather, Private Eye, Lotus Pond. Hero Arts Stamps (zig zag and dots and flowers). Flowers, leaves and edge cut on Silhouette.

Play Date with the Squirrel Girls

I combined a couple challenges with this "no particular occasion" card. Nancy at Squirrely Art tasked us squirrel girls with trying the TJ technique called cascading images and Play Date Cafe offered up a beautiful & bright color challenge this week (PDCC128). Instead of "cascading" my images, i decided to stamp and mask the bike wheel several times to create a frame. I used a white card base with an bright orange panel from the Club Scrap kit "Salsa" and a Flamingo Pink panel from the Club Scrap kit "Dream In Color". The bike and sentiment stamps are from the Club Scrap Kit called "Wheel & Sprocket".


Along with white
this week's suggested colors are:


Tuesday, April 3, 2012

Creative Chemistry 101 Day 8

  • Paint Dabber Resist Technique
  • Crackle Paint Resist Technique
  • Shattered Stains Technique

  • Club Scrap stamps from Nature's Wonders, Versailles, Dashing, Papillon